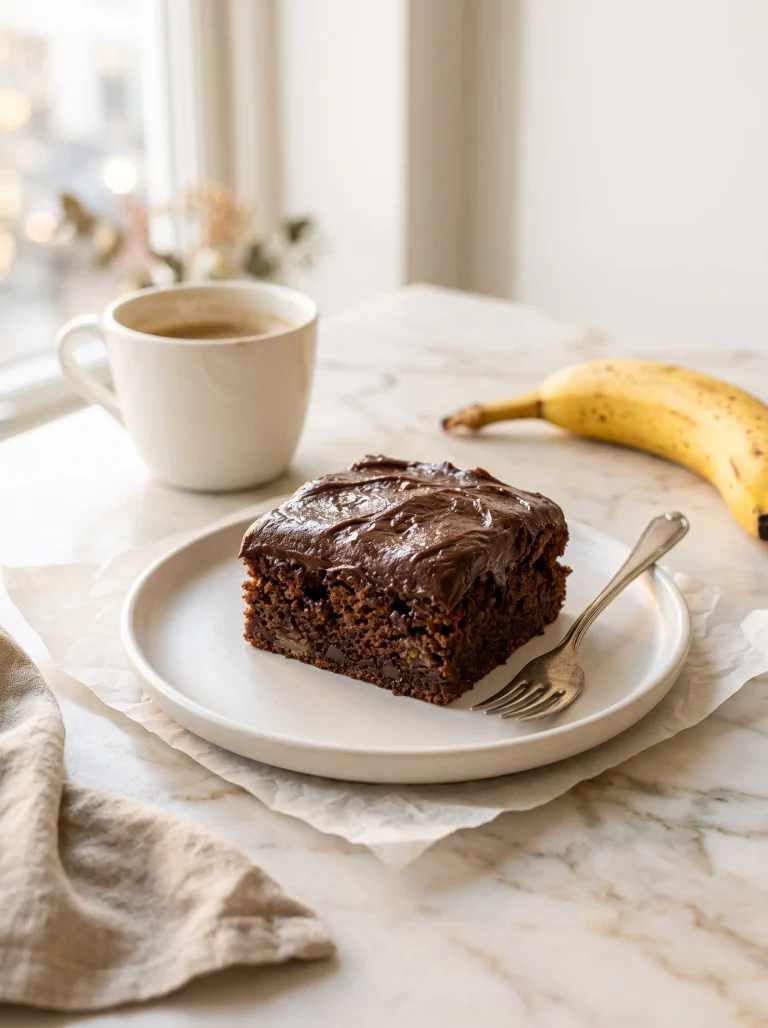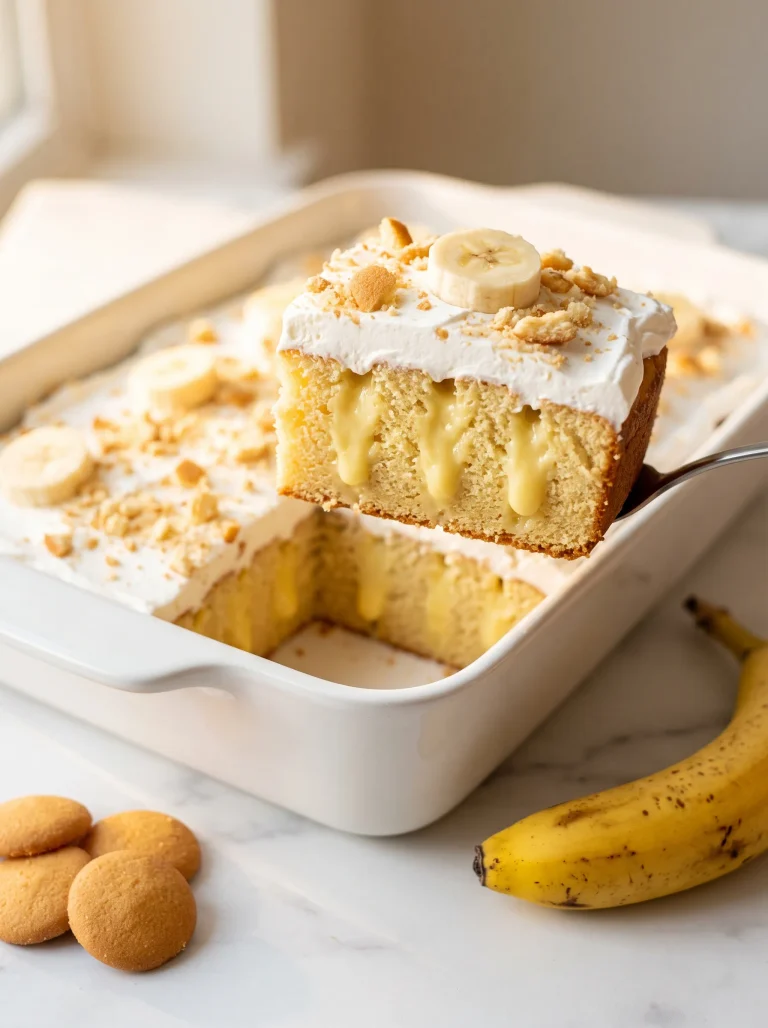

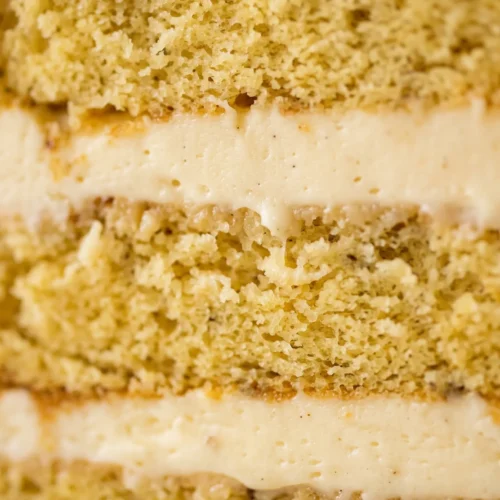
Some cakes are for Tuesdays. This banana cream cake is for the moments that matter. Three soft, naturally sweet banana layers. A real scratch vanilla pastry cream in the middle.
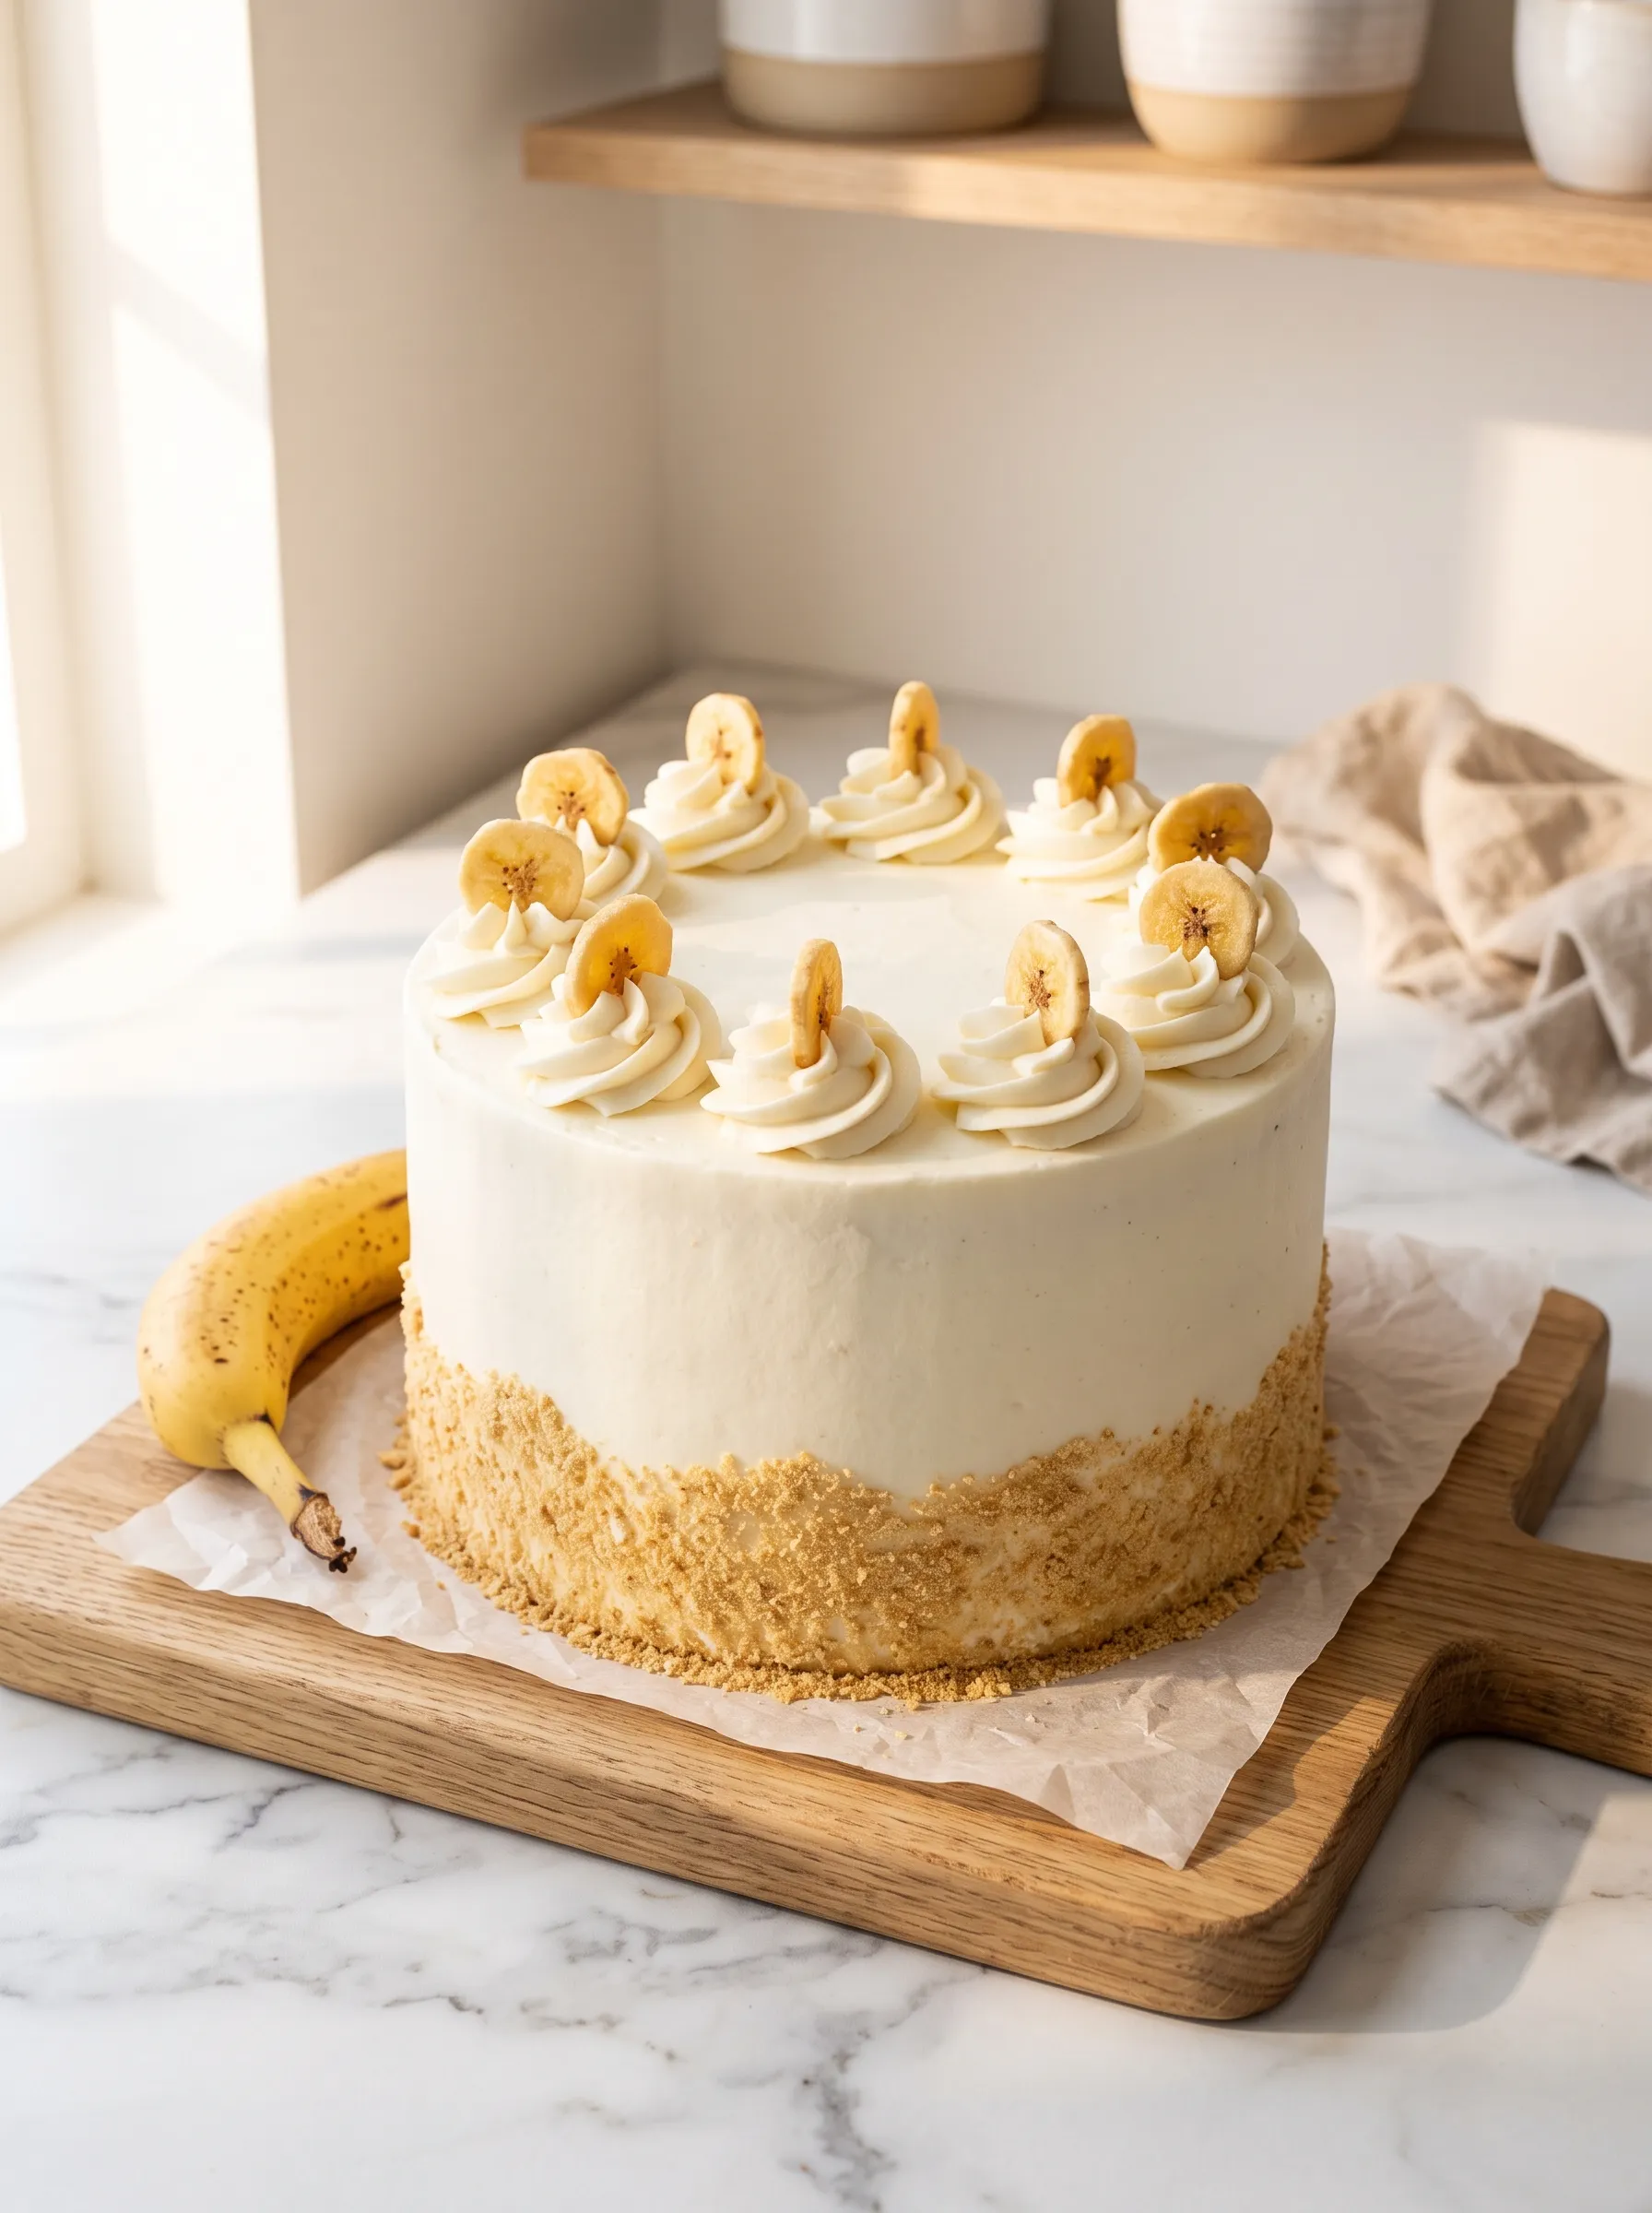
The silkiest vanilla buttercream on the outside. I made this for my daughter’s birthday last spring and the table went completely quiet when I brought it out — that kind of quiet that only happens when everyone is eating and too happy to say anything. This is the recipe I keep coming back to, every single celebration.
Why Is This Banana Cream Layer Cake Worth Every Minute?
This isn’t a quick weeknight bake — and I want to be honest about that. But every component here is straightforward, and the result is the kind of cake that makes people ask for the recipe before they’ve finished their slice. Here is exactly what makes this banana cream layer cake different from anything else you’ve tried.
- Genuinely banana-flavored layers. Three golden, soft cake layers built on real ripe bananas — no extract, no banana flavoring. Just the fruit, mashed and folded in.
- Scratch vanilla pastry cream filling. Thick, silky, completely homemade. This is what separates a banana cream layer cake from a regular banana cake with frosting in the middle.
- The frosting dam method. One simple piping technique keeps every layer perfectly stacked and the pastry cream right where it belongs — inside the cake, not oozing out the sides.
- Make-ahead friendly. The pastry cream and the cake layers can both be made a day in advance. Assembly becomes easy and calm the morning of your celebration.
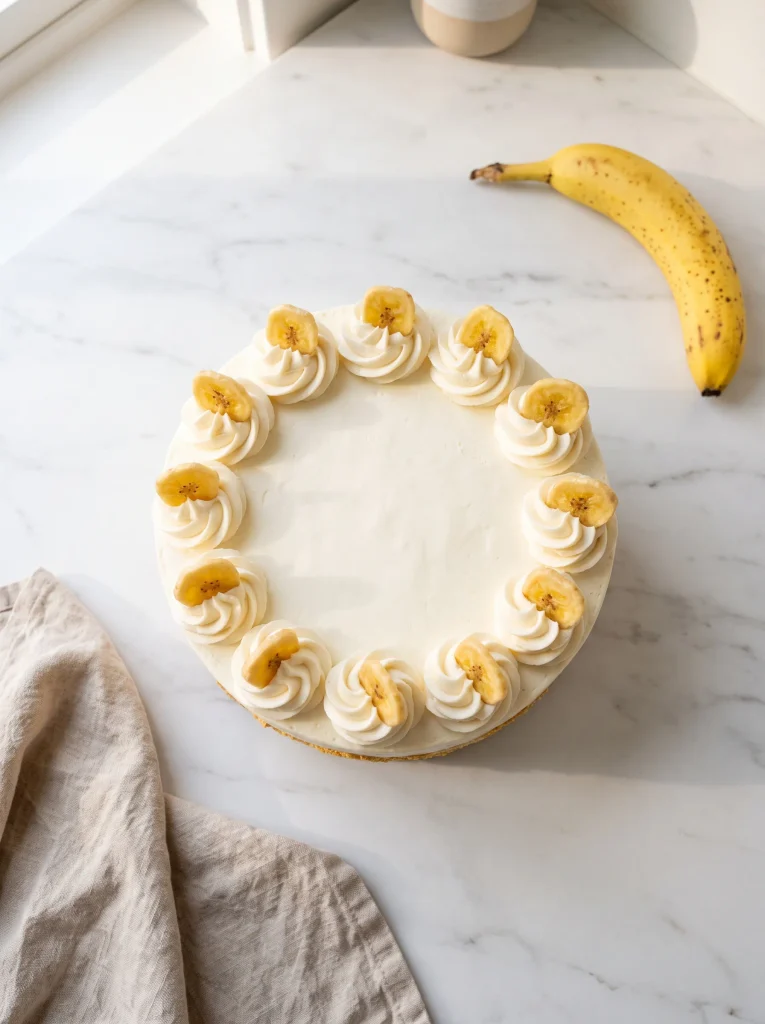
- Showstopper presentation. Vanilla wafer crumbs pressed into the sides, banana chip rosettes on top — effortlessly beautiful with no advanced decorating skills required.
What Ingredients Do You Need for a Banana Cream Cake?
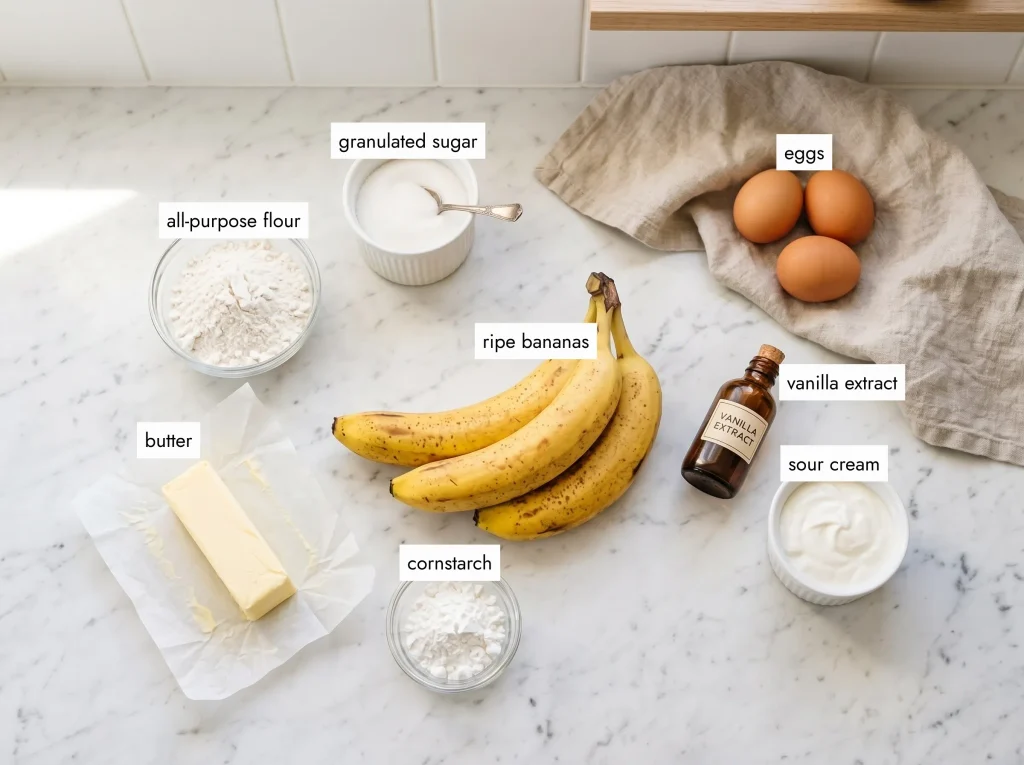
This banana cream cake has three separate components — the pastry cream filling, the cake layers, and the buttercream frosting. Each one uses simple pantry staples. Below are the key ingredient notes with substitutions so you can adapt to what you have on hand.
Vanilla Pastry Cream Filling
A banana cream cake is defined by its filling. This scratch vanilla pastry cream is thick, glossy, and sets into a slice-able consistency once chilled — very different from whipped cream or pudding mix, and infinitely better.
Whole milk (1½ cups / 360ml). Full-fat milk is non-negotiable here. It gives the cream its rich, smooth body. Don’t go below 2% or the cream will be too thin to hold its shape between the layers.
Egg yolks (3 large). They add richness and structure. Room-temperature yolks temper more smoothly into the hot milk — don’t skip that step. If you love banana-flavored custard desserts, this cream uses the same technique as our classic banana pudding filling, just made firm enough to hold between cake layers.
Cornstarch (3 tbsp / 25g). This is what thickens the pastry cream to a firm, slice-able consistency. Don’t substitute all-purpose flour — the texture and clarity of the finished cream won’t be the same.
Unsalted butter (2 tbsp / 30g). Stirred in off the heat at the very end. This creates a silky emulsion and gives the cream that glossy, satiny finish.
Pure vanilla extract (1½ tsp). Don’t reduce this. Vanilla is the second lead flavor in this entire cake.
Moist Banana Cake Layers
The secret to a genuinely moist banana cream cake lies in three ingredients most recipes overlook: sour cream, vegetable oil, and truly ripe bananas.
Ripe bananas (1½ cups mashed / 3–4 medium). Brown-spotted is what you want here — not just yellow, not green. The riper the banana, the more natural sugar it contains, and the easier it mashes into a smooth, lump-free purée that folds evenly into the batter.
Butter + vegetable oil (½ cup butter + ¼ cup oil). Using both is intentional. Butter brings flavor; oil brings lasting moisture. A cake made with butter alone firms up too much in the fridge. The oil keeps every slice tender even when served cold directly from the refrigerator.
Sour cream (½ cup / 120g). This is the ingredient most people don’t expect, and it’s the reason this banana and sour cream cake recipe stays soft for days. It adds moisture, a gentle tang that balances the sweetness, and a slightly tighter crumb that holds up under the weight of the pastry cream filling. Greek yogurt works as a 1:1 substitute.
Eggs + egg white (3 whole + 1 white). Three whole eggs provide structure and richness. The additional egg white lifts the crumb slightly, making each layer a little lighter and more tender.
All-purpose flour (2½ cups / 315g). Standard AP flour is the most reliable for a structured layer cake. Sift it with the leavening and salt before adding — it makes a real difference in the final texture.
Whipped Vanilla Buttercream Frosting
This buttercream does two jobs: it builds the frosting dam that holds the pastry cream in place, and it covers the outside of the cake. It needs to be firm enough to pipe and smooth enough to spread cleanly.
Unsalted butter (1 cup / 230g). Must be properly softened — not melted, not cold straight from the fridge. Press a finger in lightly: it should indent with just a little resistance. Properly softened butter is what whips up to that pale, airy consistency you want.
Powdered sugar (4 cups / 480g). Sift it before adding. Unsifted powdered sugar leaves tiny lumps that no amount of beating will smooth out.
Heavy whipping cream (3–4 tbsp). Adds lightness. Start with 3 tablespoons and add a fourth only if the buttercream feels too stiff to spread or pipe comfortably.
Decoration & Toppings
Vanilla wafers — Nilla Wafers (¾ cup / 75g), crushed. Pressed into the lower third of the frosted cake, they give the classic banana pudding look that makes this cake instantly recognizable. They also add a satisfying crunch against the soft frosting.
Dehydrated banana chips (10–12 pieces). One pressed into each buttercream rosette on top. They stay firm and dry, unlike fresh banana slices, which brown and release water within a few hours.
How Do You Make a Classic Banana Cream Layer Cake from Scratch?
Making a banana cream layer cake from scratch is a three-part process: the pastry cream, the cake layers, and the assembly. I always make the pastry cream first — it needs at least 2 hours to chill, and making it the night before is even better. Below I’ve broken each part into its own section so nothing feels overwhelming.
How to Make Vanilla Pastry Cream from Scratch
The pastry cream is the heart of this cake. There are only two moments that require real attention: tempering the eggs (slow and steady), and knowing when the cream has thickened enough (it will bubble and coat the back of a spoon thickly). The rest is just whisking.
Prepare & Temper
1. Combine dry ingredients with milk off the heat. In a medium saucepan off the heat, whisk together the sugar, cornstarch, and salt. Gradually pour in the whole milk while whisking constantly — dissolve the cornstarch completely before applying any heat. Lumps at this stage mean lumps in the finished cream.
2. Temper the egg yolks. In a small bowl, lightly beat the 3 egg yolks. Heat the milk mixture over medium heat, stirring, until it just begins to steam and show the first signs of simmering at the edges. Slowly pour about ½ cup of the hot liquid into the yolks in a thin, steady stream while whisking vigorously — this is the tempering step, and it prevents the eggs from scrambling. Pour the tempered yolk mixture back into the saucepan.
Cook, Finish & Chill
3. Cook until thick, then finish. Return the saucepan to medium heat. Whisk constantly until the cream comes to a full boil and thickens noticeably — let it boil gently for about 2 minutes while continuing to whisk. Remove from heat. Whisk in the butter and vanilla until fully melted and incorporated. The finished cream should coat the back of a spoon thickly and hold a line drawn through it.
4. Chill properly. Transfer to a clean bowl. Press a sheet of plastic wrap directly onto the entire surface of the cream — every inch, no air gaps — to prevent a skin from forming. Refrigerate for a minimum of 2 hours, or overnight.
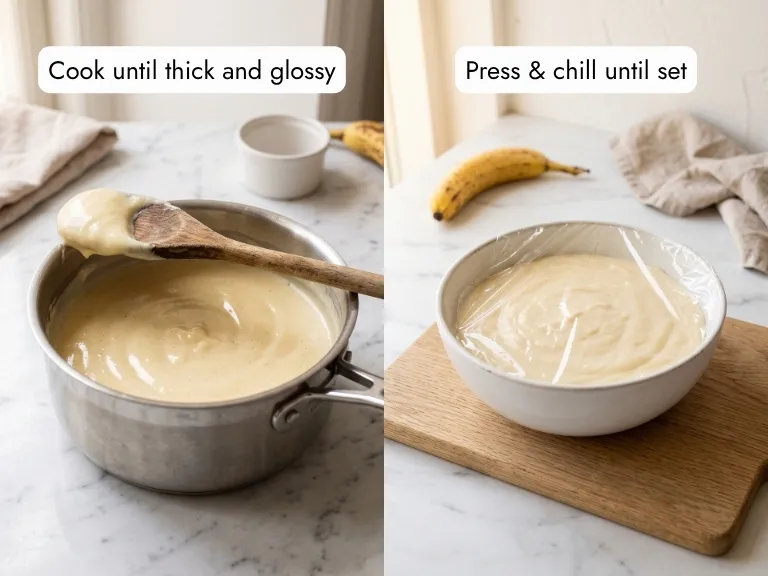
A skin that forms on the cream and gets stirred back in creates lumps in your filling. The plastic-on-surface technique costs you nothing and guarantees a silky result.
How to Bake the Moist Banana Cake Layers
The key to soft, golden layers is in three things: properly softened butter, truly ripe bananas, and not overmixing once the flour goes in. Follow the steps in order and the batter comes together in about 15 minutes.
Prep the Pans & Dry Ingredients
5. Prep your pans and oven. Preheat the oven to 350°F (175°C). Butter three 8-inch (20 cm) round cake pans generously. Line the bottom of each with a parchment circle — press it flat so it sits flush.
6. Sift the dry ingredients. In a large bowl, sift together the all-purpose flour, baking powder, baking soda, and salt. Set aside. Sifting prevents pockets of leavening and gives you a more even, tender crumb.
Mix the Batter
7. Cream butter, oil and sugar. In the bowl of a stand mixer fitted with the paddle attachment, beat the softened butter, vegetable oil, and granulated sugar on medium speed for 3 full minutes. The mixture should turn pale, almost white, and noticeably fluffy. Add the sour cream and vanilla extract and mix briefly to combine.
8. Add eggs and bananas. Start with the whole eggs, one at a time on medium speed, beating for 20 seconds after each addition. Finish with the egg white, then mix in the mashed ripe bananas on low speed until just combined — the batter will look slightly curdled at this point, which is completely normal.
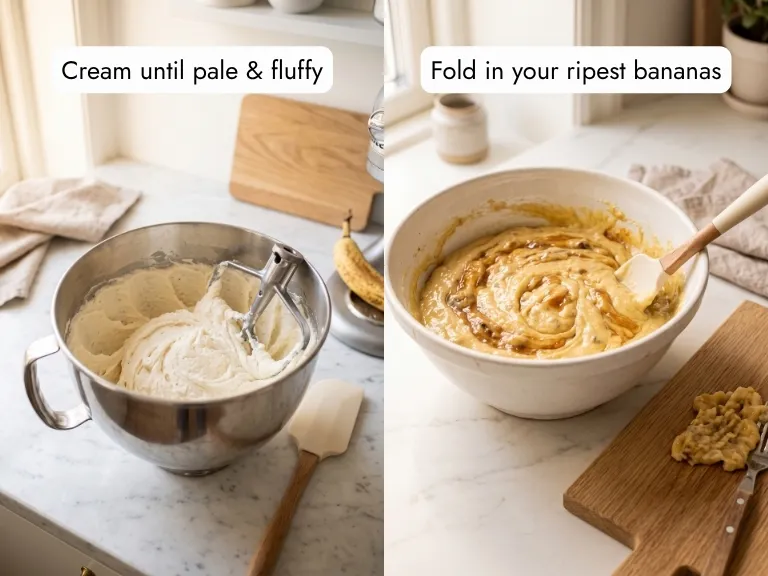
9. Fold in the dry ingredients. Add the sifted dry ingredients in two additions, mixing on low speed just until no flour streaks remain — no more. Overmixing develops the gluten and turns soft, tender cake layers into something chewy and dense.
Bake & Cool
10. Bake and cool completely. Divide the batter evenly between the three prepared pans. Bake at 350°F (175°C) for 26 to 30 minutes, until a toothpick inserted in the center comes out with just a few moist crumbs (not wet batter). Let the layers cool in their pans for 15 minutes, then turn them out onto wire racks.
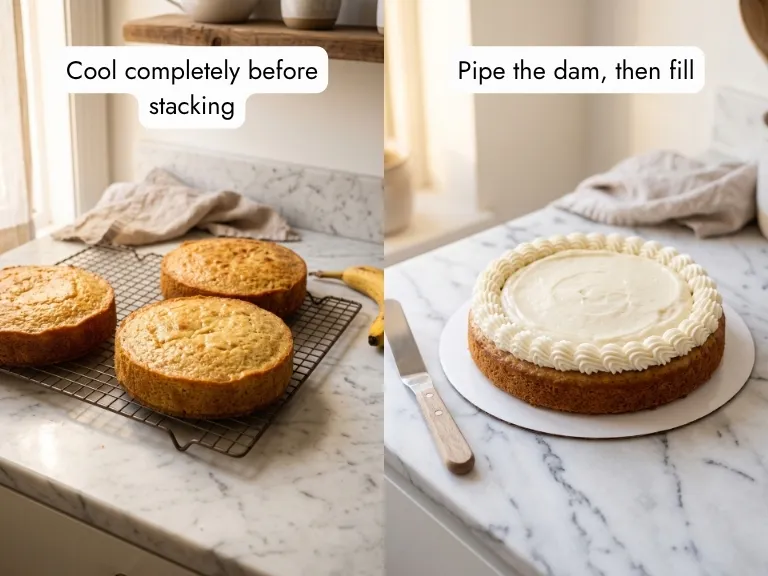
Do not rush the cooling. Warm cake layers will melt the buttercream on contact and make assembly nearly impossible. I usually bake the layers the evening before and assemble the following morning.
How to Assemble a Layer Cake with the Frosting Dam Method
This is the technique that holds the entire cake together. Most layer cake failures come from skipping this step — the weight of the upper layers pushes the filling out from the sides. One extra step, total game changer.
Make the Buttercream
11. Make the buttercream. Beat the softened butter in the stand mixer on medium-high for 3 minutes until pale and airy. Add the sifted powdered sugar in two additions. Pour in 3 tablespoons of heavy cream, the vanilla extract, and the pinch of salt. Beat on high for 2 full minutes until the frosting is white, smooth, and holds a medium-stiff peak. Transfer about one-third of the frosting into a piping bag fitted with a round tip.
Build the Layers with the Frosting Dam
12. Build the frosting dam on the first layer. Place the first cake layer on a cake board or rotating cake stand. Using the piping bag, pipe a continuous ring of buttercream around the entire outer edge of the layer — press firmly so it adheres. This ring is the frosting dam: it creates a wall that keeps the pastry cream contained. Spoon half the chilled pastry cream into the center of the dam and spread it flat with an offset spatula.
13. Stack the second layer. Gently place the second cake layer directly on top of the first. Repeat: pipe the frosting dam around the edge, then fill the center with the remaining pastry cream and smooth flat.
Crumb Coat & Final Decoration
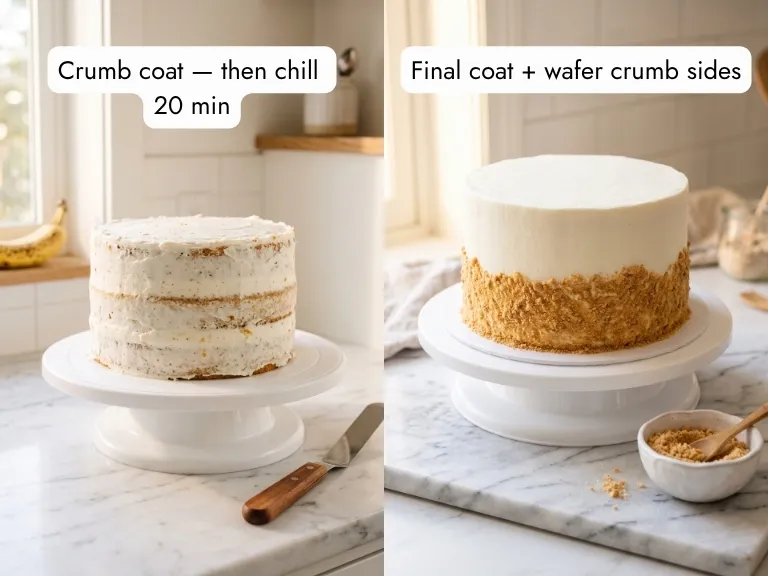
14. Top layer and crumb coat. Place the third cake layer top-side down — the flat bottom faces up, giving you a perfectly level surface for frosting. Spread a thin, even coat of buttercream over the entire top and sides to seal in any loose crumbs. Refrigerate for 20 minutes.
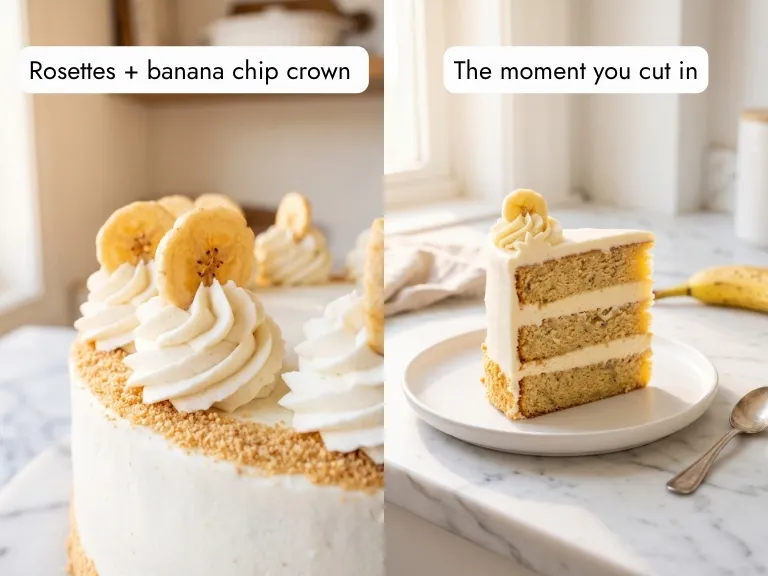
15. Final frosting, crumbs and decoration. Apply the remaining buttercream generously over the top and sides. Hold a bench scraper flat against the side of the cake while rotating the stand in slow, steady turns — this gives you clean, even sides in a few passes. With your palm, gently press the crushed vanilla wafer crumbs onto the lower third of the cake sides. Pipe small rosettes of buttercream across the top and press one banana chip into each rosette. Refrigerate for at least 1 hour before slicing.
What Are Lily’s Best Tips for a Perfect Banana Cream Layer Cake?
Every time I make this cake I notice something new. These are the tips that made the biggest difference in my own kitchen — the ones I wish someone had told me on my first attempt.
Wait for Truly Ripe Bananas
Wait for truly ripe bananas — it changes everything. Brown-spotted bananas contain up to 80% more natural sugar than yellow ones. That natural sweetness is what makes each cake layer genuinely banana-flavored without adding extra sugar. If your bananas aren’t spotty yet, put them in a 150°F (65°C) oven for 15–20 minutes — they’ll blacken and soften quickly. “The riper your bananas, the less sugar you’ll need — nature does the sweetening for you.”
Never Skip the Frosting Dam
Never skip the frosting dam. I learned this the messy way on my first layer cake. Without that piped ring of buttercream holding the pastry cream in place, the weight of the upper layers will push the filling outward during assembly and again when you slice it. It takes 30 extra seconds and solves the problem completely.
Use Butter at Two Different Temperatures
Use butter at two different temperatures. Soft butter beaten into the cake batter creates a light, airy crumb. Softened butter whisked into the hot pastry cream at the end creates a silky, glossy emulsion. Both matter — and they need to be handled at different temperatures for different reasons.
Don’t Add Fresh Banana Slices Between the Layers
Don’t add fresh banana slices between the layers. It sounds like a good idea. It isn’t. Raw banana slices release water within a few hours, brown visibly, and soften the cake layers beneath them. The banana flavor is already in every bite of the cake itself. The banana chips on top give you the visual without the structural problem.
Slice with a Warm, Dry Knife
Slice with a warm, dry knife. Run a large chef’s knife under hot water and dry it completely before each cut. The warmth glides through the buttercream cleanly, and you get those beautiful slices that show every layer and the pastry cream without smearing.
Can You Make This Banana Cream Cake in Different Ways?
Once you’ve made the base recipe, there are a few directions worth exploring. Some are simple swaps; others are full recipes in their own right.
Salted Caramel Banana Cream Cake. After spreading the pastry cream on each layer, drizzle a thin line of salted caramel sauce directly over the cream before placing the next layer on top. The contrast of cold vanilla pastry cream and warm caramel in each bite is genuinely something else.
Chocolate Chip Banana Cream Cake. Stir ½ cup of mini chocolate chips into the finished cake batter just before portioning into the pans. The chips stay distributed evenly and add small pockets of chocolate warmth to every slice.
With Caramelized Bananas on Top. Swap the banana chip rosette topping for a crown of these warm caramelized bananas, spooned over the top of the finished cake right before serving. The contrast of warm, golden-glazed banana against the cold cream is the best version of this cake I’ve made so far.
Simpler 2-Layer Version. Bake the batter in two 9-inch (23 cm) round pans instead of three 8-inch pans and reduce the bake time by 2 to 3 minutes. You’ll have one filling layer instead of two, which makes assembly faster and slightly less tall. If you want all the flavor with even less building, our classic banana cake with cream cheese frosting is a one-bowl bake that delivers in a third of the time.
Banana Pudding Layer Cake Version. Replace the scratch pastry cream with a well-chilled vanilla pudding and add a layer of whole vanilla wafers between each cake layer alongside the cream. The result is closer to a layered banana pudding experience in cake form — more casual, less refined, equally good.
How Long Does Banana Cream Layer Cake Last and How Do You Store It?
Because this cake contains a scratch egg-based pastry cream filling, it must be refrigerated at all times and should never sit at room temperature for more than 2 hours.
Counter: Not recommended. Egg-based pastry cream is a perishable filling and cannot be left unrefrigerated safely.
Fridge: Up to 4 days in an airtight cake carrier or under a deep cake dome. This cake actually slices more cleanly on day 2 — the layers have had time to settle and the flavors deepen. Before serving, let individual slices rest at room temperature for 15 minutes: the buttercream softens and the pastry cream becomes more fluid and luxurious.
Freezer: Up to 2 months. Freeze the fully assembled, frosted cake uncovered on its board for 1 hour until the buttercream exterior is completely firm. Then wrap tightly in two layers of plastic wrap followed by one layer of aluminum foil. Thaw overnight in the refrigerator — never at room temperature or the pastry cream filling may develop condensation and lose its structure.
Meal prep tip: Make the vanilla pastry cream up to 3 days ahead and keep it refrigerated with plastic wrap pressed on the surface. Bake and wrap the three cake layers up to 2 days ahead and store at room temperature. Assemble the morning of your event — it takes about 45 minutes and is a much calmer experience than doing everything in a single session. If you’re serving a smaller group, our banana pudding cupcakes deliver all the banana cream flavor in individual portions that are easier to store and serve.
Frequently Asked Questions About Banana Cream Cake
A banana cream cake is a layer cake built around two classic banana dessert elements: a moist, ripe banana-flavored sponge and a thick scratch vanilla pastry cream used as the filling between layers. Unlike a banana cream pie, it is fully baked and structured to serve a crowd. Unlike a banana pudding cake, it uses a true cooked custard rather than a no-bake pudding mix filling.
The key difference is the filling. A banana cream layer cake uses a scratch vanilla pastry cream — a cooked custard made from milk, egg yolks, cornstarch, butter, and vanilla — that sets firm and slice-able once chilled. A banana pudding cake typically uses instant vanilla pudding or a no-bake pudding filling, which is softer and looser. Both are delicious; the pastry cream version holds its structure better when sliced and served at a celebration.
The frosting dam is a ring of buttercream piped along the outer edge of each cake layer before the pastry cream filling is spread in the center. It acts as a wall, preventing the soft filling from being pushed outward under the weight of the layers above. Without it, the pastry cream will squeeze out from the sides when you stack layers or when you slice the cake. It takes less than a minute per layer and completely solves the problem.
Yes — and I recommend it. The vanilla pastry cream keeps refrigerated for up to 3 days with plastic wrap pressed directly on its surface. The baked cake layers can be stored wrapped in plastic at room temperature for up to 2 days. On the day of your celebration, you only need to make the buttercream and assemble the cake, which takes about 45 minutes. The fully assembled cake keeps refrigerated for up to 4 days.
Make It This Weekend
This banana cream layer cake has become the birthday cake in our house. My kids request it every single year — my oldest calls it “the cloud cake” because of how soft each layer is. If you make it, take your time with the pastry cream and don’t rush the cooling. Every minute is worth it.
Tag me on Instagram @eatwithmellow or leave a star rating below — I read every single one and it helps more people find this recipe.
If you love this, try our banana cupcakes with vanilla buttercream for a celebration-ready individual version, or our no-bake banana pudding cheesecake for when you want all the banana cream flavor with zero oven time.
Love, Lily 🍌
Want to save this recipe?
Classic Banana Cream Layer Cake
Equipment
- Three 8-inch (20 cm) round cake pans
- Stand mixer with paddle attachment
- Large offset spatula
- Bench scraper / cake smoother
- Rotating cake stand / turntable
- Wire cooling racks
- Piping bag + round or star tip
Ingredients
Vanilla Pastry Cream Filling
- 1½ cups 360ml whole milk
- 3 large egg yolks room temperature
- ½ cup 100g granulated sugar
- 3 tbsp 25g cornstarch
- ⅛ tsp fine sea salt
- 2 tbsp 30g unsalted butter, softened
- 1½ tsp pure vanilla extract
Banana Cake Layers
- ½ cup 115g unsalted butter, softened to room temperature
- ¼ cup 60ml vegetable oil
- 1½ cups 300g granulated sugar
- 3 large eggs room temperature
- 1 egg white room temperature
- 1 tbsp 15ml pure vanilla extract
- ½ cup 120g sour cream, room temperature
- 1½ cups 340g mashed ripe bananas (approx. 3–4 medium)
- 2½ cups 315g all-purpose flour
- 1 tsp baking powder
- ½ tsp baking soda
- ½ tsp fine sea salt
Whipped Vanilla Buttercream
- 1 cup 230g unsalted butter, softened to room temperature
- 4 cups 480g powdered sugar, sifted
- 3 to 4 tbsp 45–60ml heavy whipping cream
- 1½ tsp pure vanilla extract
- Pinch of fine salt
Decoration
- ¾ cup 75g vanilla wafers (Nilla Wafers), crushed into fine crumbs
- 10 to 12 dehydrated banana chips
Instructions
Make the pastry cream
- In a medium saucepan off the heat, whisk together sugar, cornstarch, and salt. Gradually whisk in milk until the cornstarch is fully dissolved and no lumps remain.
- Lightly beat egg yolks in a small bowl. Heat the milk mixture over medium heat until it begins to steam. Slowly pour about 1/2 cup of the hot liquid into the yolks in a thin stream while whisking constantly. Pour the tempered mixture back into the saucepan.
- Cook over medium heat, whisking constantly, until the cream comes to a full boil and thickens. Boil gently for 2 minutes. Remove from heat and whisk in butter and vanilla until fully incorporated.
- Transfer to a bowl and press plastic wrap directly onto the surface. Refrigerate for at least 2 hours or overnight.
Bake the cake layers
- Preheat oven to 350°F (175°C). Butter three 8-inch round pans and line the bottoms with parchment circles.
- Sift together flour, baking powder, baking soda, and salt into a large bowl. Set aside.
- Beat softened butter, vegetable oil, and granulated sugar in a stand mixer on medium speed for 3 minutes until pale and fluffy. Add sour cream and vanilla; mix briefly to combine.
- Add whole eggs one at a time, beating after each addition. Add egg white. On low speed, mix in mashed bananas until just combined.
- Add dry ingredients in two additions on low speed, mixing just until no flour streaks remain. Do not overmix.
- Divide batter evenly between the three pans. Bake for 26–30 minutes, until a toothpick comes out with a few moist crumbs. Cool for 15 minutes in the pans, then turn out onto wire racks and cool completely.
Make the buttercream
- Beat softened butter on medium-high for 3 minutes until pale and airy. Add sifted powdered sugar in two additions, then heavy cream, vanilla, and salt. Beat on high for 2 minutes until white, smooth, and fluffy. Transfer one-third of the frosting to a piping bag fitted with a round or star tip.
Assemble
- Place the first cake layer on a cake board or rotating stand. Pipe a thick ring of buttercream around the entire outer edge to create a frosting dam. Spread half the chilled pastry cream in the center and smooth level with an offset spatula.
- Place the second cake layer on top. Repeat the frosting dam and fill the center with the remaining pastry cream.
- Place the third cake layer flat-side up. Apply a thin crumb coat of buttercream over the entire top and sides. Refrigerate for 20 minutes.
- Frost the entire cake with the remaining buttercream. Smooth the sides with a bench scraper. Press crushed vanilla wafer crumbs onto the lower third of the sides. Pipe rosettes on top and press one banana chip into each rosette. Refrigerate for 1 hour before slicing.
Notes