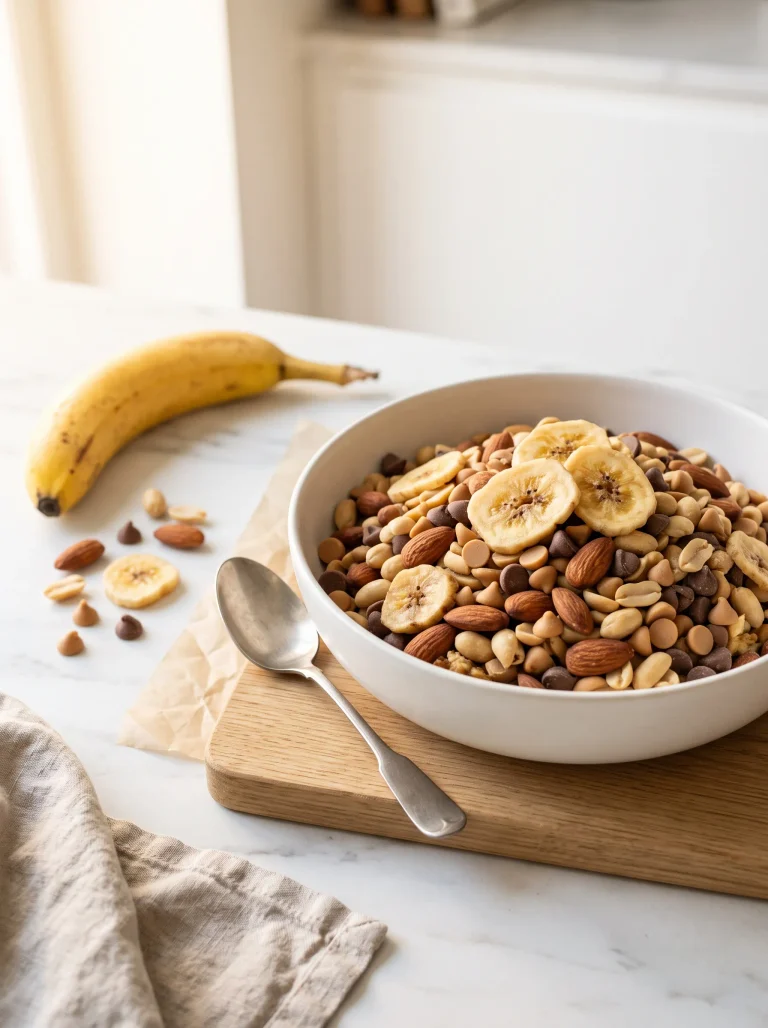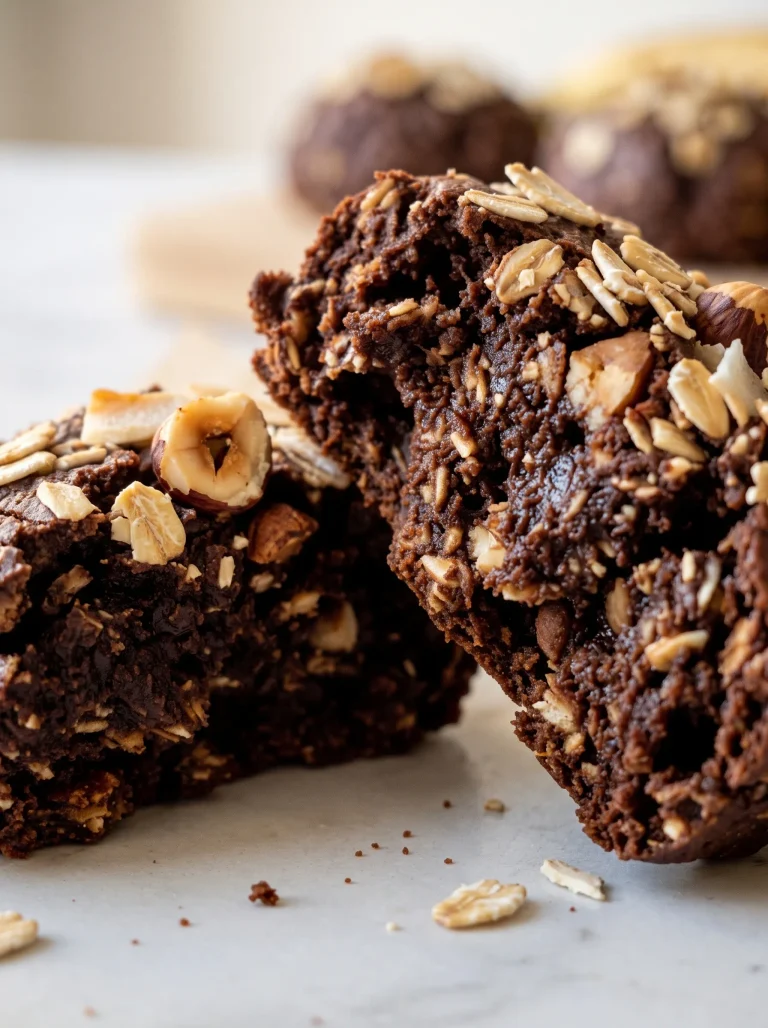

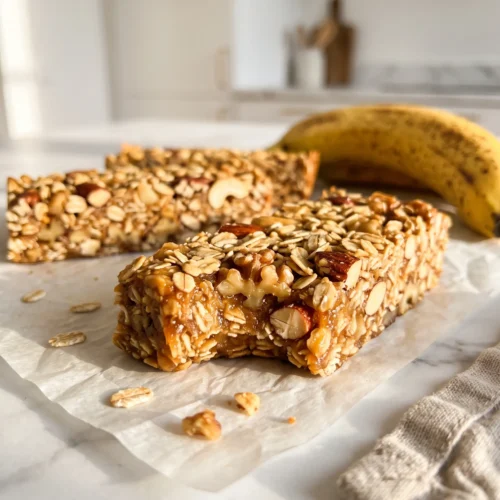
Banana granola bars are chewy, golden bars made from oven-roasted bananas, toasted nuts, oats and dates, with no eggs, no oil and no refined sugar. This banana granola bar recipe makes 10 bars in 1 hour 30 minutes.

I first made them for a Saturday hike with my three, after a box of store-bought bars turned to crumbs at the bottom of my backpack. These held. The trick is roasting the bananas first, so they turn sticky and sweet instead of wet. Unlike our softer, cake-like banana oat bars, these stay chewy and firm enough to travel.
Why You’ll Love These Banana Granola Bars
These are the bars I bake on Sunday so the week feels a little easier. They go in backpacks, gym bags and coat pockets, and they come back out in one piece. Here’s why they stay on repeat in our kitchen.
- They hold together. Roasted banana and dates make a sticky binder, so the bars stay whole in a bag all day.
- Naturally sweet, no refined sugar. All the sweetness comes from ripe bananas and soft dates. No honey, no syrup, no brown sugar.
- Vegan, egg-free and oil-free. The nuts bring all the fat the bars need. Use certified gluten-free oats and they’re gluten-free too.
- A warm, toasty flavor. Roasting the bananas gives them a deep, toffee-like taste, and toasting the nuts makes them rich and golden.
- Made for meal prep. One pan gives you 10 bars that keep for 7 days in the fridge or 3 months in the freezer.
Ingredients for Healthy Banana Granola Bars
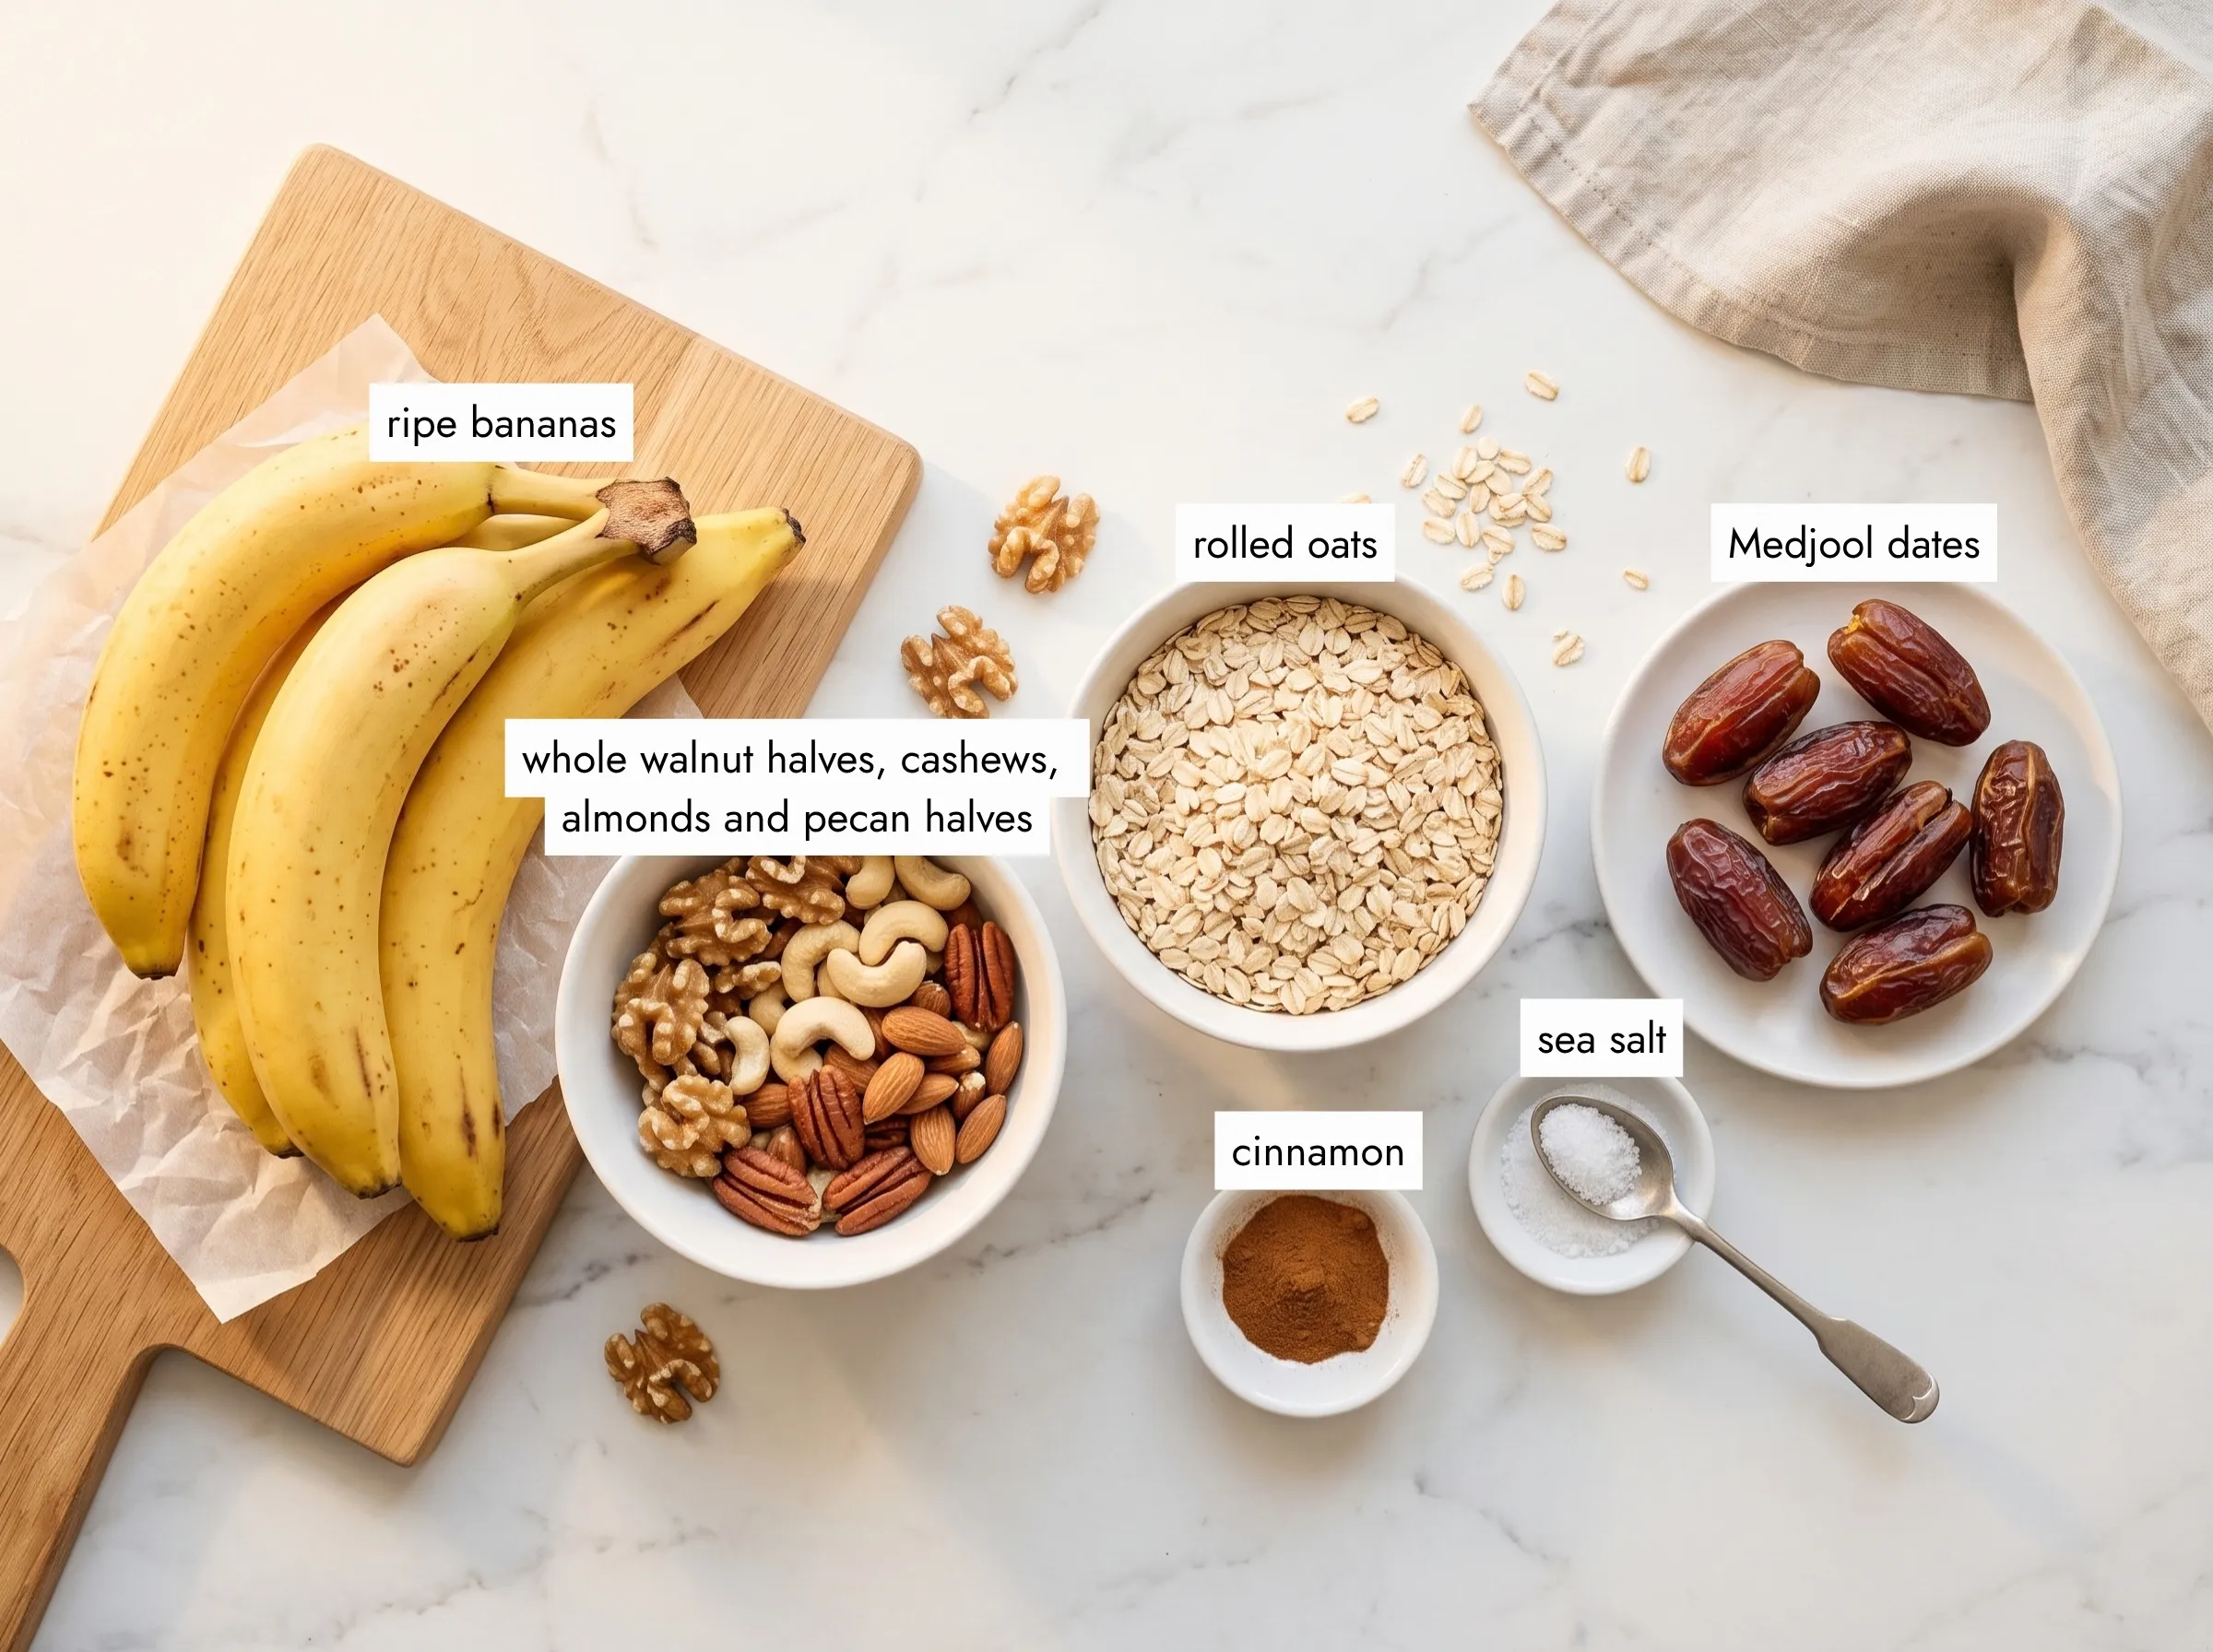
Seven simple ingredients, and one of them is optional. Each one has a job: the bananas and dates hold everything together, the nuts and oats give the bars their chew and crunch, and a pinch of salt wakes up the sweetness. That’s what makes these healthy banana bars feel like a real snack, not a dessert.
The Bananas and Dates (the Binder)
Ripe bananas. Use 4 medium bananas, about 1 lb (470 g) once peeled. Pick yellow bananas with plenty of brown spots. They’re sweet, but still firm enough to slice into neat rounds. Fully black bananas are too soft to slice and turn mushy in the oven. You’ll roast the slices at 375°F (190°C) for 15 minutes until the edges turn golden. It’s the same golden trick I use for my warm caramelized bananas, just in the oven instead of a skillet.
Soft Medjool dates. Use 7 Medjool dates, about 6 oz (170 g) once pitted. Dates are what make these date granola bars stick together without honey or peanut butter. They should feel soft and squishy. If yours are dry or firm, soak them in warm water for 10 minutes, then drain and pat them dry. You can use 14 smaller Deglet Noor dates instead, soaked the same way.
The Nuts and Oats (the Chew and Crunch)
Mixed raw nuts. Use 1½ cups (200 g) of unsalted raw nuts. I use a mix of walnuts, cashews, almonds and pecans, but any mix works. This is where the “banana nut bars” flavor comes from: toasted walnuts and pecans taste like the top of a warm banana bread. Need them nut-free? Swap in seeds (see the Variations below).
Rolled oats. Use 1 cup (90 g) of old-fashioned rolled oats, divided into two ½-cup (45 g) portions. Half gets toasted and chopped with the nuts. The other half goes in whole at the end, which gives the bars their granola chew. Choose certified gluten-free oats if you need the bars gluten-free. Quick oats turn pasty, so skip them here.
The Flavor
Ground cinnamon and fine sea salt. Use ½ teaspoon of cinnamon and ¼ teaspoon of fine sea salt. The salt matters more than you’d think: it balances the sweetness of the dates and makes the roasted banana taste deeper.
Vanilla extract (optional). 1 teaspoon of pure vanilla adds a cozy, bakery-like note. A pinch of freshly grated nutmeg works too.
No eggs, no oil, no sugar. You won’t find any flour, butter, oil, eggs or sugar in this list. The nuts bring the fat, and the roasted bananas and dates do the binding and the sweetening.
How to Make Banana Granola Bars
This is a simple recipe with three short trips to the oven: the bananas roast, the nuts and oats toast, then the pressed bars bake. You’ll need a food processor with at least a 7-cup (1.7 L) bowl. Each oven step is short, and the pulsing takes less than 2 minutes.
Roast the Bananas
- Heat the oven. Preheat your oven to 375°F (190°C). Line a large rimmed baking sheet with parchment paper.
- Slice the bananas. Peel the bananas and cut them into ¼-inch (6 mm) rounds. Spread them out in a single layer on the parchment, without overlapping.
- Roast until golden. Bake for 15 minutes, until the slices look golden and caramelized at the edges and smell like banana bread. Let them cool on the tray for 5 minutes.
After 15 minutes at 375°F (190°C), the slices turn golden, sticky and sweet.
Toast the Nuts and Oats
- Lower the heat and toast. Turn the oven down to 350°F (175°C) and leave the door open for 1 minute to let it cool faster. Spread the nuts and ½ cup (45 g) of the oats on a second rimmed baking sheet. Toast for 10 minutes, stirring once halfway, until fragrant and lightly golden.
- Get the pan ready. Turn the oven down again to 300°F (150°C). Line an 8×8-inch (20 cm) square pan with parchment paper, leaving extra paper hanging over two sides. Those flaps will help you lift the bars out later.

Walnuts, cashews, almonds, pecans and half the oats, toasted for 10 minutes until golden.
Make the Dough
- Pulse the nuts and oats. Add the toasted nuts and oats to the food processor. Pulse 8 to 10 times, until they look like coarse, pebbly crumbs. Stop before they turn into flour.
- Add the binders. Scrape the roasted bananas off the parchment with a spatula and add them to the bowl with the dates, cinnamon, salt and vanilla. Process for 45 to 60 seconds, until everything forms a thick, sticky dough that clumps together.
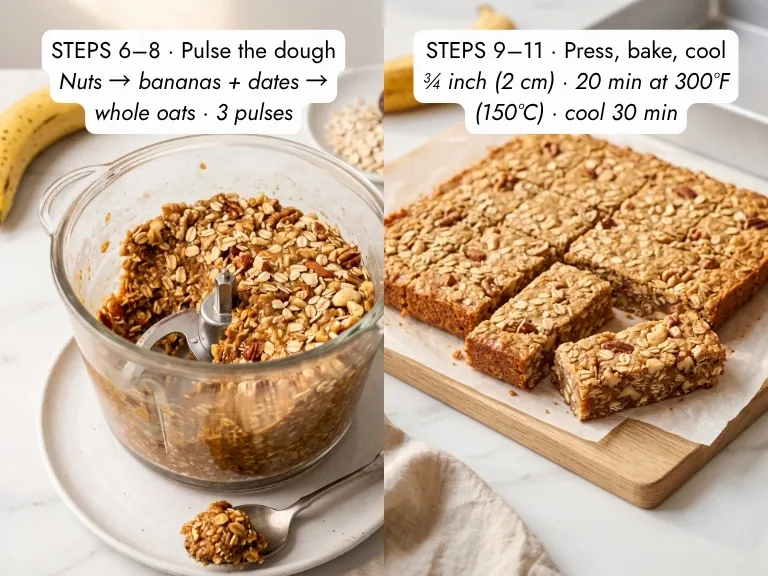
- Add the whole oats. Add the remaining ½ cup (45 g) of untoasted oats. Pulse 3 times, just enough to mix them in. Keeping these oats whole gives the bars their chew.
The dough should be thick, sticky and full of whole oats. If it holds when you pinch it, you’re ready.
Press, Bake and Slice
- Press it firmly. Tip the dough into the lined pan. Wet your hands with cold water and press it into an even layer about ¾ inch (2 cm) thick, right into the corners. Smooth the top with the bottom of a measuring cup.
- Bake. Bake at 300°F (150°C) for 20 minutes, until the edges are golden and the top feels dry and springs back when you touch it.
- Cool, then slice. Let the pan cool on a wire rack for 30 minutes. Lift the slab out with the parchment flaps. Cut it in half, then cut each half into 5 strips, for 10 bars about 4 × 1½ inches (10 × 4 cm). Press your knife straight down and wipe it clean between cuts.
Lily’s Tips for Chewy Bars That Don’t Crumble
My first batch fell apart in my hands. It tasted lovely, but it was granola, not granola bars. It took a few tries to get bars that hold. These are the tips that made the difference.

- Roast the bananas first. Always. It’s the step that makes this recipe work. Roasting dries the bananas out and turns their natural sugars sticky, so they glue everything together. Half a mashed banana replaces one egg in baking — bananas are one of the best natural binders. Roasted, they bind even better.
- Keep half the oats whole. If you chop all the oats with the nuts, the bars turn dense and pasty. The whole oats added at the end give you that real granola bar chew.
- Press harder than you think. Loose dough means crumbly bars. Wet hands let you push the dough firmly into the corners without it sticking to your fingers.
- Soften firm dates. Dry dates don’t blend into a smooth paste, and they’re tough on your food processor. Ten minutes in warm water fixes both problems. Just pat them dry so you don’t add extra water.
- Let them cool for the full 30 minutes. Right out of the oven, the bars are soft and fragile. As they cool, the roasted banana and dates firm up and set. “These bars aren’t done when they come out of the oven — they finish as they cool.”
Why Roast the Bananas First?
Fresh bananas are about 75% water. Mashed straight into a bar, all that water soaks into the oats and you get something soft and cake-like. Roasting the slices for 15 minutes cooks off part of that water and concentrates the natural sugars. The result is a sticky, toffee-like banana that binds the nuts and oats into a chewy bar instead of a spongy one.
Banana Granola Bars vs. Banana Oat Bars
Both are made with bananas and oats, but they aren’t the same snack. Here’s the difference.
| Banana Granola Bars (this recipe) | Banana Oat Bars | |
|---|---|---|
| Texture | Chewy and dense, with golden edges and crunchy nuts | Soft, moist and cake-like |
| Bananas | Sliced and roasted in the oven first | Mashed raw into the batter |
| Binder | Roasted banana + dates | Mashed banana |
| Method | 3 short oven steps + a food processor | One bowl, one bake |
| Best for | Backpacks, hikes, the gym bag | A cozy breakfast at home |
Banana Granola Bar Variations
Once you know the method (roast, toast, pulse, press, bake), you can switch the mix-ins. Keep the same base: 4 bananas, 7 dates and 1 cup (90 g) of oats. Here are the versions we make most at home.
Nut-Free Banana Granola Bars
Want granola bars without nuts? Replace the 1½ cups (200 g) of mixed nuts with ¾ cup (100 g) of raw sunflower seeds and ¾ cup (100 g) of raw pumpkin seeds. Seeds toast faster than nuts, so toast them with the oats for 8 minutes instead of 10. Everything else stays the same. This is the version I make for lunchboxes. Check your school’s rules, and buy oats and seeds packed in a nut-free facility if allergies are a concern.
Chocolate Banana Nut Bars
Melt 1.75 oz (50 g) of 70% dark chocolate and drizzle thin zigzags over the cooled bars with a fork. Chill for 15 minutes to set the chocolate. For chocolate in every bite, stir ⅓ cup (60 g) of dark chocolate chips into the dough by hand after step 8, once it’s lukewarm. Choose a chocolate labeled dairy-free to keep the bars vegan.
Cranberry Pecan Bars
Use only pecans for the nuts, and stir ¼ cup (30 g) of chopped dried cranberries into the dough by hand after step 8. Most dried cranberries are sweetened with sugar, so look for ones sweetened with apple juice if you want to keep the bars free of refined sugar.
Cardamom and Coconut Bars
Add ¼ teaspoon of ground cardamom with the cinnamon, and 2 tablespoons (10 g) of unsweetened shredded coconut with the whole oats in step 8. Toast the coconut with the nuts for the last 3 minutes if you like a deeper flavor.
Want Them No-Bake?
If you don’t want to turn on the oven, the same banana, oat and nut idea works rolled into bites. Try our no-bake banana energy balls. They’re ready in minutes and live in the fridge.
Which Banana On-the-Go Snack Should You Make?
Our blog has a few banana snacks made to leave the house. Here’s how they compare.
| Snack | Format | Oven? | Where it keeps | Best for |
|---|---|---|---|---|
| Banana Granola Bars (this recipe) | Chewy baked bars with nuts, oats and dates | Yes, 45 min | Counter, fridge or freezer | Hikes, gym bags, busy mornings |
| Banana Oatmeal Energy Balls | No-bake bites with oats and peanut butter | No | Fridge | A quick snack at home |
| Peanut Butter Banana Trail Mix | Nuts, banana chips and sweet bits in a jar | No | Pantry | Long trips and road snacks |
| Baked Banana Chips | Thin banana slices baked until crisp | Yes | Airtight jar | A crunchy, salty-sweet nibble |
How to Store Banana Granola Bars
These bars keep well, which is why I always bake them on Sunday. The roasted bananas and dates keep them moist, so the fridge is the best place for them after day 3.
Counter: 3 days in an airtight container. The roasted bananas and dates keep the bars moist, so they start to soften after 3 days. On hot days, keep them in the fridge from day 1.
Fridge: Up to 7 days in an airtight container, with parchment between the layers. They turn firmer and chewier when cold. Let a bar sit on the counter for 5 minutes, or warm it in the microwave for 10 seconds, if you like it softer.
Freezer: Up to 3 months. Wrap each bar in parchment or wax paper, then put them all in a freezer bag. Thaw on the counter for 30 minutes, or drop a frozen bar straight into your bag in the morning. It’s ready to eat in about 1 hour.
Meal prep tip: On Sunday, I bake a double batch in a 9×13-inch (23 × 33 cm) pan and add 5 minutes to the final bake. I always have extra ripe bananas out, so I slice two more for a tray of crispy baked banana chips while the oven is still warm.
Banana Granola Bars FAQ
These are the questions I get most often about this recipe. The short answer comes first.
Homemade granola bars usually fall apart because they were cut while still warm, pressed too loosely, or made with too little binder. In this recipe, roasted bananas and dates bind the bars, pressing with wet hands packs the dough tightly, and 30 minutes of cooling lets them set. If your bars still crumble, press harder next time and make sure your dates are soft.
Yes, they’re a wholesome snack. Each bar has about 250 calories, 5 g of protein and almost 5 g of fiber. Most of the fat comes from nuts, and all of the 18 g of sugar comes from bananas and dates, with no refined sugar added. They’re filling, so one bar is a good snack and two make a quick breakfast on the go.
Dates and roasted bananas hold these granola bars together. Blended with the nuts, the dates turn into a thick, sticky paste, and the roasted bananas add a toffee-like stickiness. Pressing the dough firmly into the pan and letting it cool completely does the rest. No honey, syrup or peanut butter needed.
You can replace part of the dates, but not all of them. Keep at least 4 dates, and swap the rest for 2 tablespoons of maple syrup or honey. The dates give the bars their body, so replacing all of them makes the bars softer and stickier. Maple syrup keeps them vegan; honey doesn’t.
From My Oven to Your Backpack
If you have four spotty bananas and a handful of nuts, you’re one relaxed afternoon away from a week of real, wholesome snacks. Roast, toast, pulse, press, and let them cool. Then tuck one into your bag and enjoy it wherever your day takes you.
Tag me on Instagram @eatwithmellow or leave a star rating below. I read every single one.
If you love this, try a no-bake trail mix with banana chips for the trail or our cozy vegan banana bread next!
Love, Lily 🍌
Want to save this recipe?
Banana Granola Bars
Equipment
- 2 large rimmed baking sheets
- Parchment paper
- 8×8-inch (20cm) square baking pan
- Food processor, 7-cup (1.7L) bowl or larger
- Silicone spatula
- Large chef's knife
- Wire cooling rack
Ingredients
THE BINDER
- 4 medium 470g peeled ripe bananas, yellow with brown spots
- 7 170g pitted soft Medjool dates, soaked 10 minutes if firm
THE NUTS & OATS
- 1½ cups 200g mixed raw unsalted nuts (walnuts, cashews, almonds, pecans)
- 1 cup 90g old-fashioned rolled oats, certified gluten-free if needed, divided
THE FLAVOR
- ½ tsp 1g ground cinnamon
- ¼ tsp 1.5g fine sea salt
- 1 tsp 5ml pure vanilla extract (optional)
Instructions
- Preheat the oven to 375°F (190°C) and line a rimmed baking sheet with parchment.
- Slice the bananas into ¼-inch (6mm) rounds and spread them in a single layer.
- Roast for 15 minutes, until golden and caramelized at the edges. Cool 5 minutes.
- Lower the oven to 350°F (175°C). Toast the nuts and ½ cup (45g) of the oats on a second baking sheet for 10 minutes, stirring once halfway.
- Lower the oven to 300°F (150°C). Line an 8×8-inch (20cm) pan with parchment, leaving an overhang on two sides.
- Pulse the toasted nuts and oats 8 to 10 times in a food processor, into coarse crumbs.
- Add the roasted bananas, dates, cinnamon, salt and vanilla. Process for 45 to 60 seconds, into a thick, sticky dough.
- Add the remaining ½ cup (45g) of oats and pulse 3 times.
- Press the dough firmly into the pan with wet hands, about ¾ inch (2cm) thick.
- Bake for 20 minutes, until the edges are golden and the top springs back.
- Cool in the pan on a wire rack for 30 minutes.
- Lift out with the parchment and slice into 10 bars, about 4 × 1½ inches (10 × 4cm).
Notes
3 months in the freezer, each bar wrapped in parchment. Thaw 30 minutes on the counter.
For a double batch, use a 9×13-inch (23 × 33cm) pan and bake 25 minutes. Note 2 — Nut-free : Replace the nuts with ¾ cup (100g) sunflower seeds + ¾ cup (100g)
pumpkin seeds. Toast them with the oats for 8 minutes instead of 10. Note 3 — Dates : Use 14 Deglet Noor dates instead of 7 Medjool. You can swap up to 3 dates
for 2 tbsp of maple syrup (vegan) or honey (not vegan); the bars will be softer. Note 4 — Technique : Cut only after 30 minutes of cooling. Warm bars crumble. Note 5 — Nutrition : Estimated per bar for 10 bars, with Medjool dates and a
walnut-cashew-almond-pecan mix, without optional add-ins.